s2-g2 432 Posted August 4, 2015 This started out as a wheel thing. Then it evolved. So... I'm going to take a shot at detailing my first custom build. I absolutely love the old Wild Willy model - so I decided to restore an M38, and add some custom touches along the way. Last year I picked up an M38 in fair shape at auction. It was missing a few parts, but the body was in good shape and the chassis seemed OK in the eBay pics. Willy himself looked to have had an unfortunate meeting with an axe-murderer... I took the rig completely apart and thoroughly cleaned everything. I didn't take any pictures of that process - other than to document the parts it looks like Willy shot holes in... I didn't know about those until dismantle time... Must've been one heck of a ride... I patched the holes with Milliput, sanded them smooth and painted them with gloss black. Then I reassembled the rig completely - replacing stripped or broken hardware where needed - and I was pretty happy with the results. ... Now, for the wheel part. I love the size, and look of the classic WW1 tires. Unfortunately, I don't have many of those, and - as you know - replacements get pretty pricey when they pop up on eBay. So, I started looking for a tire that was close in size to the original Willy rubber. My plan was to custom design some rims so I could run the modern tires. Something 1.9 was the goal so I would have the option of different rubber in the future. They're not an exact match to the Willy tires, but I found some Gmade MT1902s that I thought might work, so I ordered a set. Willy did the comparison to the originals... They were close enough for what I wanted to accomplish. For my first stab at this, I designed a 3-piece wheel just like the original: a front, a back, and an inner-ring to hold the tire in place. I put things together in FreeCAD. I sent my designs off to Shapeways. I only did one wheel at a time to start, because I wasn't sure how things would turn out. Next up - getting, painting, testing, and refining wheels. Then, the other mods start coming together... 1 Share this post Link to post Share on other sites
CamaroTom 9 Posted August 4, 2015 Nice restomod, keep the pics coming! 1 Share this post Link to post Share on other sites
s2-g2 432 Posted August 5, 2015 Nice restomod, keep the pics coming! Thanks! So, while I was waiting on wheels, I decided to work on custom headlights with the old M38 guards. Like these: I designed a new set of head lights with mounts for the guards. The plan was to use paperclips for the actual metal part of the guard. When the lights came in from Shapeways, the smaller peg for mounting was just too skinny for the print process and broke off. At least with one peg positioning was a little easier... So, I primed and primed and primed and sanded and primed and sanded and painted until I had somewhat smooth "glass" on the lenses. I'd like to try these printed in that transparent acrylic and maybe really light them on a future build... or enhancement to this build later... I cut and bent paperclips for the metal guards and glued them in the mounts. Cool find - we had some rubber coated paperclips and the black ones looked just right thinkness-wise: Looking back, I need to change the angle of the installation to better match the real one in the pic above. While I was finishing up with lights, I started on the first version wheel that had come in from the printer. In my excitement, I took NO pictures of the raw printed wheel before I painted it... Here's the finished version of the revision 1 model: After painting up the V.1 model, I realized I could make a simpler 2-piece wheel with a bead-lock backing ridge. The cost of printing these guys was a motivator to cut back. Removing the internal cylinder would cut about $8 off the cost of the wheel... So, I re-designed the wheel with the bead-lock backing ridge - and a 1mm wider rim flange because I thought it would fit and look better with the MT-1902s: that's it for now. More mods coming up. 2 Share this post Link to post Share on other sites
chevelle 997 Posted August 5, 2015 Nice work, I'm looking forward to seeing more. You have the chassis assembled so do you have any pic's with the V1 wheel on? 1 Share this post Link to post Share on other sites
s2-g2 432 Posted August 5, 2015 Nice work, I'm looking forward to seeing more. You have the chassis assembled so do you have any pic's with the V1 wheel on? Thanks! And yes, I do. Please pardon the potato-camera quality, but you'll get the idea: Here's the V1 rim/tire mounted - Side Front Rear 1 Share this post Link to post Share on other sites
frameskip 63 Posted August 6, 2015 Excited to see how you get on with this. Tires/wheels have unfortunately relegated my M38 to a cardboard box for many many months... 1 Share this post Link to post Share on other sites
chevelle 997 Posted August 6, 2015 Those tyres look like the will do the job Yes I too have a complete M38 to re-build just deciding when build to start next or which one to finish I did have 2 but passed one on in a trade with a buddy 1 Share this post Link to post Share on other sites
Shodog 1835 Posted August 6, 2015 With the larger diameter tires, will the wheelie bar spring still reach the ground? 1 Share this post Link to post Share on other sites
s2-g2 432 Posted August 6, 2015 With the larger diameter tires, will the wheelie bar spring still reach the ground? Yes - pics of the V2 wheels and tires coming up shortly, but I have been successfully slamming the wheelie springs to the ground the last few days testing . Share this post Link to post Share on other sites
s2-g2 432 Posted August 6, 2015 So while I was waiting for the V2 wheels to come back from Shapeways, I started thinking about grille and winch modifications. I've always liked the grille of (any) Jeep and thought it'd be nice to see more of it on the Willy. I cut and started bending a plate to relocate the winch off of the actual grille and set it lower. My thought was to attach it to the front body post mount: and here it is mocked up with the busted grille that came with the rig About this time, the V2 wheels were back... Here's a raw front wheel where you can see the wider rim flange and the different design for the front hub... Some detail shots of the wheel in assembly stages: Things fit quite nicely with the new 2-piece design... Next up, custom bumper to protect the winch, and V2 wheels mounted and compared to the originals and then tested... 1 Share this post Link to post Share on other sites
IBIFTKH 1369 Posted August 6, 2015 Loving the work you're doing with this, and your upgrade parts in your other thread. You and Simensays are going to cost me money!! 1 Share this post Link to post Share on other sites
s2-g2 432 Posted August 7, 2015 Loving the work you're doing with this, and your upgrade parts in your other thread. You and Simensays are going to cost me money!! Thank you Rob! The work you've done - and your extensive Willy Pit Crew has given me sooo many ideas. I've only got a couple of "helpers" right now on my shop desk, but I run all my ideas by them Share this post Link to post Share on other sites
s2-g2 432 Posted August 7, 2015 Just a quick update tonight... Now that the winch was out of the way of the grille, I wanted a nice pretty grille to display. The one that came on the rig was not going to do... Over a year ago I had contacted Toykid before I was even on TC and he sold me a couple of grilles that he had previously recreated in the M38 style. I had just bought a new WW2 at the time and really wanted to change the grille to the older style. Thanks James! (I ended up saving the grilles for M38 restorations, and keeping my 1st WW2 build true with the horizontal slots) So, I took one of those grilles and trimmed the winch mounts out of it, sanded it smooth, and voila: To frame and protect the winch sitting under the grille I designed a "basher" bumper: And... when it finally came in from Shapeways I checked it out on the rig. Keep in mind my springs were kinda bent and wonky when I took this pic: Things were starting to take shape... More tomorrow -Stuart Share this post Link to post Share on other sites
chevelle 997 Posted August 7, 2015 Gee it's lucky this is just a runner Excellent work mate. 1 Share this post Link to post Share on other sites
s2-g2 432 Posted August 8, 2015 Gee it's lucky this is just a runner Excellent work mate. Ha! Thank you But, yes - it'll run in nice "clean" places for now. I really want to see how the custom printed wheels hold up so I'm going to put some stress on them. Not quite the same running my M38 Basher gets though! Here are a few more shots comparing one side running stock M38 wheels and tires vs. the custom ones on the other side: Front view Top view 1 Top view 2 Rear view And one with the new wheels with the body in progress: hmmm.... the recess on the front wheel kinda bugged me a little... My wheel design is a little bit deeper than the stock wheel. So, I designed some hub caps to cover the recess: At this point, I maybe should have looked into buying stock in Shapeways (?) 2 Share this post Link to post Share on other sites
Falcon#5 594 Posted August 8, 2015 At this point, I maybe should have looked into buying stock in Shapeways (?) Or at least your own printer, sounds like you could sell these things! 1 Share this post Link to post Share on other sites
s2-g2 432 Posted August 8, 2015 One of the first designs I tackled while re-learning CAD was a CJ2A windshield for the Willy. That was planned for this build. I talk about it here: CJ2A windshield for the Wild Willy Here it is finished on another rig, borrowing the stock hinges from that one: Once I got the windshield done, I decided I wanted to use any (limited quantity) original hinges that I had on truer-to-stock restorations, so I started designing a a set of plastic hinges for the windshield. This was my second design: I have some work yet to do on these, because I chose to trim a bevel onto the printed pieces to better fit the angle of the hood before installation. I cut them and test fitted them: With the bevel cut, the hinges actually hold the windshield tight to the cowl without attachment to the roll-bar. That's good because for this build I wanted to forgo the front roll-bar hoop and side bars. In the same Shapeways order, I picked up one of Simen's (Simensays) jerry-can backers. It really dresses up the look of the gas can: Simen's work and designs are amazing stuff. (mind the sloppy paint, I'm still touching up... Sometimes I wonder if a monkey with finger-paints could do a better paint job than me) More to come... Stuart Share this post Link to post Share on other sites
chevelle 997 Posted August 8, 2015 I love these wheel's I would be tempted to give up my originals for a set of them 3 Share this post Link to post Share on other sites
s2-g2 432 Posted August 9, 2015 I love these wheel's I would be tempted to give up my originals for a set of them Thanks! There was a question above about the larger diameter tires and the wheelie springs... Here's some testing video. The springs hit and balance the wheelies just fine. Put your wheels in the air like you just don't care: 2 Share this post Link to post Share on other sites
emory70 153 Posted August 9, 2015 I really like what you're doing here, and I hate to sound overly critical, but could you make the wheels so that the screws are installed from the rear? 1 Share this post Link to post Share on other sites
s2-g2 432 Posted August 9, 2015 I really like what you're doing here, and I hate to sound overly critical, but could you make the wheels so that the screws are installed from the rear? Doesn't sound critical to me - I really appreciate the feedback! Yes, you could easily reverse the screws. I thought about it, but wasn't sure about the look... ultimately I think I'll fill the screw heads with putty and paint them. I know that will make change-outs or maintenance a little harder, but it'll clean up the look. Here's a reversed one for you to see: The recess takes the nut fine. It's snug, but it fits. Sometime during this project, in another thread it was pointed out that the original Wheeler used a one-piece wheel with a backing plate. This is only an issue in the front where you have to bury the bearing inside the wheel. I've designed another set of wheels to try that concept with some other tires I have (more of a traditional military look). I don't have the extra money to print those right now, but they're queued up to try out. They would have no hardware showing in the front: Wheel face (the little nubs are part of the design to mimic an old M38 combat rim): Front: Pocket for bearing in Rear: And the plate that holds the bearing in the wheel: TLDR : Yes, you can reverse them, and I have ideas to remove the hardware from the front face on future designs 1 Share this post Link to post Share on other sites
emory70 153 Posted August 10, 2015 Cool. If I ever get around to my "should have waited for the rere Monster Beetle" project, I've got to figure out how I want to do beadlocks on it 1 Share this post Link to post Share on other sites
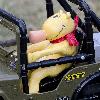
s2-g2 432 Posted August 11, 2015 I'm almost done painting details, then I'll post finished shots. Before I do, I wanted to talk about my driver for a sec. This is how I used to paint drivers: Then I found that awesome "How to paint a driver" page by Fabrizio under "Reference" at the top of the Tamiya Club home... Those AMAZING steps went under my clear desk mat for quick and easy reference: And now I paint drivers like this: Or even like this if I REALLY concentrate: Still not quite Fabrizio class work, but a huge improvement over what I'd do on my own. So, THANK YOU, Fabrizio - wherever you are. 1 Share this post Link to post Share on other sites
frameskip 63 Posted August 11, 2015 TLDR : Yes, you can reverse them, and I have ideas to remove the hardware from the front face on future designs Read twice, actually...! Looking forward to seeing these come to life. 1 Share this post Link to post Share on other sites
s2-g2 432 Posted August 12, 2015 Read twice, actually...! Looking forward to seeing these come to life. Thank you for that, Frameskip - I appreciate it. Couple of comparison pics tonight to an original M38 to show the stance of the new wheels/tires. I have a few more small details to paint/add, then I'll get some good shots of the final product... Head on: Side view: Rear: 2 Share this post Link to post Share on other sites