
s2-g2
-
Content Count
246 -
Joined
-
Last visited
Everything posted by s2-g2
-
"Modified" my wheelie bars today. My son's Razor Scooter gave me the idea. It has a kick-brake that has flint embedded in it so it makes a shower of sparks... So, I bought a set of spark igniters for a propane torch or welder. They come in a 5-pack and are threaded. The thread matches the thread on a Hotshot antenna base... So, I bent banged/pried/clamped a Hotshot antenna into a crude wheelie-bar and added some threaded bar so I could connect the spark igniter. Then I installed my "flame pipes" on the GigaM38. And I went for a test drive. It works!!! (Pardon my inept videographer skillz) https://www.youtube.com/watch?v=sOEbq8G6eXY and in slo-mo This is a first stab at the project to prove if it worked. Now I just need to spend some time perfecting the antenna-bend-into-wheelie-bar process.
-
Certainly! - Search "1 10 scale oil drum" on eBay. Got mine from a seller named VRCHobbies. I'm on the US eBay, but looks like sure there's several on the UK site right now.
-
looking forward to your refurbish!!
-
Thanks! ...and me too! I was worried it might look too toy-like and silly, but I think it turned out ok... ... Got a Shapeways package this week and did some more detail work... First, my scaffold idea for the relocated hood body-mounts came out OK, but I made it too wide to fit inside the fender walls... So, I had to cut it and narrow it. I'd re-print it narrower, but ($$$) so, I just cut it and "improvised" Here's how it looked when it was too wide: and how it fits on the chassis: I had to narrow this, but forgot to take a pic... I'll post that sometime later. The scaffold bolts down to the stock mount platform with nuts/screws. That scaffold moves the body mount to two new mounts at the back and to the sides of the engine blower cavity. I decided to do something different with the hood pins... The tension against the hood and between the two mounts keeps the retainer bar in place (at least so far) - so, I'll stick with that design. I just need to grunge up the hood "pin" retainer rod now. Heh... It pinned right through the bad weld that fixes the front-to-back hood crack. (Such a Frankenstein build...) Next, I fashioned a new plate for the extra fuel tank to connect to the on-board tank. I "riveted" that in place on the fuel drum with brads and superglue: and then dirtied it all up and connected the dump-hose into the on-board tank: Gravity-fed extra 55 gallons of high octane guzzoline, baby! I'm having fun with making a tire combo to approximate the real GigaHorse inspiration for the build, but one of the best parts of having an M38 beater/runner is popping on the stock tire/wheel combo and running it just as the big T intended. Those old paddle wheels just look so right on this body, I can't help going back to them for play time. Lucky for me my runner wheels are a mess and fit right along with the MadMax look! I had an idea this week and bought some flint-tipped welder spark-igniters. I'm making a set of wheelie bars that will put the flint to the concrete and hopefully make a light show out back. More on that soon... Stuart
-
:o :o Awesome!!!!
-
Wow! Cool project!!! Looking forward to seeing more. I'm also very interested in the 3D printed organic rubber tires.
-
That mesh looks great! Nice job.
-
Oooh! I've been wanting to try the whole tire narrowing procedure I've seen done on TC. These might just fit the bill. Off to eBay for me. Thanks for the idea guys!
-
Motor time Spent some time this weekend properly installing the new motor engine in the GigaM38. I'll just let the pictures do the talking. Measure once, cut twice. (or maybe the other way around...) An old radiator will do nicely for the recessed engine deck. Engine deck glued in place. ... and also puttied in place. (I want the deck to support plenty of weight/stress) Grille out, front view of the engine's recessed posture in the rig. Engine is screwed down to the recessed mounting plate here via two screws from the bottom up. For my main belt, I used a soldering iron to pre-melt it to contour around the pulleys. I tried several other belt ideas before settling on the zip-tie as the final one. I fashioned a main pulley out of some drywall hardware and screwed/puttied it to the bottom of the engine mount. Then I painted that to match the rest of the engine. I want the belt to look as if it actually goes down around a main shaft/pulley from the top of the hood. Here you can see the pre-melted drive belt going around all the pulleys. I melted the belt together at the bottom of the main pulley. I also super glued the belt once it was in place to make sure it stays where it is supposed to be. Here's the engine with belt installed with the grille back in place. I'm happy with the effect. Potato-camera quality (the engine is very reflective), but you can see the painting to dirty things up... Cool unintended effect: the back of the drive belt (zip tie) has grooves. So, now I am without a front (hood) body mount. To fix this, I designed a scaffold to relocate the hood mount to two new mounts further back and to the sides of the hood. This piece will fit on the mount that normally holds the spring and hood mount: Just waiting for it to come in from Shapeways... Why yes. Yes it does.
-
Cool - Never saw one of those before. And that reminds me - I gotta start designing the exhaust pipes!
-
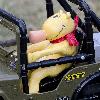
This is very true. I saw something on Instagram this weekend where a guy was using Pez dispenser heads for his 1:10 model driver heads. He had painted a Hulk head normal flesh colors and it looked pretty sharp. I'm gonna check out Pez dispensers the next time I'm out and about. This build is fantastic. Really enjoying it!
-
Thank you! I really appreciate the feedback. Keeps me motivated! Check it out. I stuffed the eBay (John Deere toy tractor) tires I bought with foam and managed to widen them enough to look OK on the rims. I'm gonna keep looking, but this is what I'm gonna run for right now. They're a harder plastic, and result in some skids in turns, but right now they'll do. And I'm still not tired of tires. Also spent some time painting the roll-bar connector. Looks good, so I've ordered three more from Shapeways. I dropped the height of the rear cage hoop by about half an inch. I didn't like how high it was sitting. Looks more streamlined now. I'll post a side shot of that change soon... Roll bars... The monkey bars of the Mad Max universe. And I spent some time assembling the motor/blower and starting to paint... Gotta mount/recess this soon or Immortan is gonna get indigestion again. Onward to Valhalla! Stuart
-
That's a very good point. Even though this is a comic build (Can Willy not be?) so far the tires ground it in reality. Well... post-apocalyptic Mad Max reality at least. I actually have several variants of "1.5 Tire" saved in my eBay preferences with real-time alerts. Yes... I have an addiction...
-
Ha! OK, ok - Following is an installment that hopefully helps! Thank you! >>>> WOOO HOOO! Shapeways package arrival today. Many things to work on! But, first - this last week I fashioned some metal straps to hold the fuel drum in place: Can't have that bouncing off during a high-speed chase. Safety first in the Wasteland! I need to burnish the straps and weather them, but I'm pretty happy with how they fit and hold the tank on-board. Gotta work on the fuel hose that dumps that tank into the stock one. Now, back to that delivery... My motor additions came in and they fit together nicely. Results are a much more respectable presence on the hood. Immortan seemed happy... Mmmmm, fresh engine straight from the printer... Vroom! I say vroom-vroom, son. Now I just have to figure if I'm going to cut the hood or black out a "recess" - also, what do do about the hood body-mount I've buried - and I gotta make a belt to fit all those pulleys... I'm happy with how the 1.5" wheels printed out - and the stance they give the rig (more on that in a minute). But, I'm still desperately searching for the right rubber. The tractor tires I bought off eBay are a little too skinny... Since the 1.5's are small up front, I'd like a little width. The FAV rears I have on there now are close to the footprint I want, but the tread is obviously ALL wrong. Whew... measurements for the bearing pocket were right on thanks to a planetary alignment... The bearing cover lined up nicely... Stock upright in place... Too puny for this rig! Wasteland-class heavy-duty basher upright in place... Those rims sure are purty... time to rust them and uglify them for the post-apocalypse! Soooo.... I'm still looking for tractor tires. Also - I've been watching stuff like this on eBay: I'm thinking these -might- work, but they're +++ $$$ Know an aggressive tire design that might fit the bill? I'm still up for suggestions from anyone! So, here's the GigaM38 as it sits right now. You can see the raked stance with the smaller 1.5's up front. Also - the roll-bar cage parts printed out and fit just right, so I need to print 3 more of them. I'll likely modify the screw flange I added to that part since it stands out quite a bit. As you can see, I have a tire tread issue going on up front. #$@#!$ motor slid forward in this pic... I'm gonna fire the photographer. Try finding a parking place for that thing... Time to start some more paintin' Also... gotta look at those undercarriage parts and treat them to match the rest of the rig. More soon! Stuart
-
Awesome work. Oooh! A chase vehicle too! Looks like Skottoman did a FAV Willy... He's towards the bottom of this page: http://www.tamiyaclub.com/forum/index.php?showtopic=72600
-
So sweet! I have that one on my "someday list" - looking forward to see what you do with it.
-
Thanks! I really appreciate it! I put the Willy paint-guide from TC under the clear protector on my work desk Thanks for the feedback! These are both great points for either side of that argument. You miss the true need for exposed engine parts in the Mad Max universe, though. You have to have something to hold on to when you're riding on the hood at insane speeds. -Stuart
-
Thank you! I do think I'd be homeless and scorched now considering my success that day.... I've been traveling and super busy, but managed to get a couple of things done in the last two days: Got the Gigabumber painted... needs some more weathering, but the basic idea is there... Don't want to see that one in my rear-view mirror... Also applied more of the salt technique I learned from JennyMo's StumpKamper build to the tailgate: again... hungry for a pretzel about now. And since I'm stuck waiting on the added engine parts from Shapeways, I mocked up how the whole new blower is going to look by combining the parts in FreeCAD... Immortan will be much happier, I think... Then I created a quick roll-bar link to tie the two cage hoops together. If this prints out right and fits, I'll print and install either 2 or 4 across the two hoop tops making the cage. safety first... So again, I'm waiting by the mailbox -Stuart
-
Ha! I missed Bruiser Dude's response to Mr. T above. Too funny. I wonder what he'd have to say now about the head on his dash...
-
Love it. Nicely detailed build! Looking forward to more!!
-
Loving the wheel/tire options you have going here. Those Flat Irons and Badlands are sweet. (as I remove my WW2 from the shelf and start looking at the stock wheels.... hmmm....)
-
The black-thumb war-boys made baby steps this week on the GigaM38, but at least there was a shipment from Shapeways. >>>> I think the evil bumper came out pretty nice. Time to paint, weather, and detail. This should be fun. I'm thinking of red LEDs behind the bumper slots. outta the way mortals! The engine/blower idea will need some more work. I had designed it to fit above the engine bay realistically - without infringing on the radiator. The result is a little too tiny in my opinion... Nothing shiny and chrome about that that's gonna need some improvement... So, I designed the top of an engine block that will sit under the head - to give things a bigger footprint and push the blower up taller... The existing blower will notch right onto the top of this. I'd redo the whole thing, but 3D printing is expensive, so I'll salvage and use what I've done so far. more motor, happier Immortan... Also, I made an intake to sit over the existing intake to make it a bit bigger too... bigger holes to spit high-test guzzoline straight into... The big thing for me this week was teaching myself how to sew on a sewing machine. After a bit of repetition and practice, I think have workable battle flags. At least they look good streaming out behind the rig when it is running. I slightly bent the antenna rods to angle the flags backwards a bit. I also mounted the high roll-bar at the back. There will be another roll bar in the normal spot that I will connect to the rear unit to make a cage. Just a maniac tyrant out for a spin in his wheelie death-machine... My 1.5 inch front wheel came out great, but the tractor tires I got off eBay are a little too small. I'll post some pictures eventually of the wheel "situation" and how that's progressing. I gotta send a second wheel to print since the first one came out OK. -Stuart
-
That's a good tip. The only way I could have made a bigger mess with this part of the project was if I had figured out away to use fire. Thank you! I can laugh about it now.... ugh. ...... A little more work on the wheel tonight: Also, followed Emory70's excellent advice and started scanning the John Deere tractor toy listings on Ebay. Found a set of smaller tractor tires for the front end and won that auction. So, maybe next week I'll have them in hand. They may direct fit the wheel I have printing at Shapeways right now.... we'll see. Stuart
-

Rob's projects (latest - Willy's Brat, Hazard Willy, WW2 cutaway)
s2-g2 replied to IBIFTKH's topic in The Builds
OK- so just a "stumped" version then... Coolness. BTW - I've been referring people to your STUMPkamper build to check out your salt rust treatment. I followed it and was very pleased with the results in my latest build. (thanks for the momentary hijack of your thread, Rob) Has the Wild Willy shop crew started any work on the Mog? -Stuart
