

glob356
-
Content Count
52 -
Joined
-
Last visited
Posts posted by glob356
-
-
@Balgaroth Hi, Really sorry. I missed your post.
Please find below the parts that I used:
"What is the long alu part running on the length of the tub?"
The long part is to reenforced the tub that is low profile now (removed 1 cm of plastic).
Not perfect. Not strong enouph (2 mm only). Will be replace by 3 mm carbon soon.
Don't hesitate to contact me if you need any information. For example, I use only Hex screws bought on Ebay. So I have a the references.
Have a great day.
Glob
-
 1
1
-
-
-
All aluminium parts should be replace by carbon ones by the end of the year. Will see!

-
1
-
-
-
Hi @Hobgoblin and @Juggular,
Thank you both for your advices
I'm using a Tamiya TEU-104BK as ESC on my Blitzer. I could try a 21T I guess.
I add some pictures of my "modified" Blitzer Stadium.
Glob356
-
1
-
-
-
Hi,
I want to buy a new brushed motor for my modified Blitzer Stadium. I wonder how many turns is best for the Blitzer? Tamiya silver can motor is 27T. Do I need a 21T, 23T?
Thank you for your advice!
Glob356
-
-
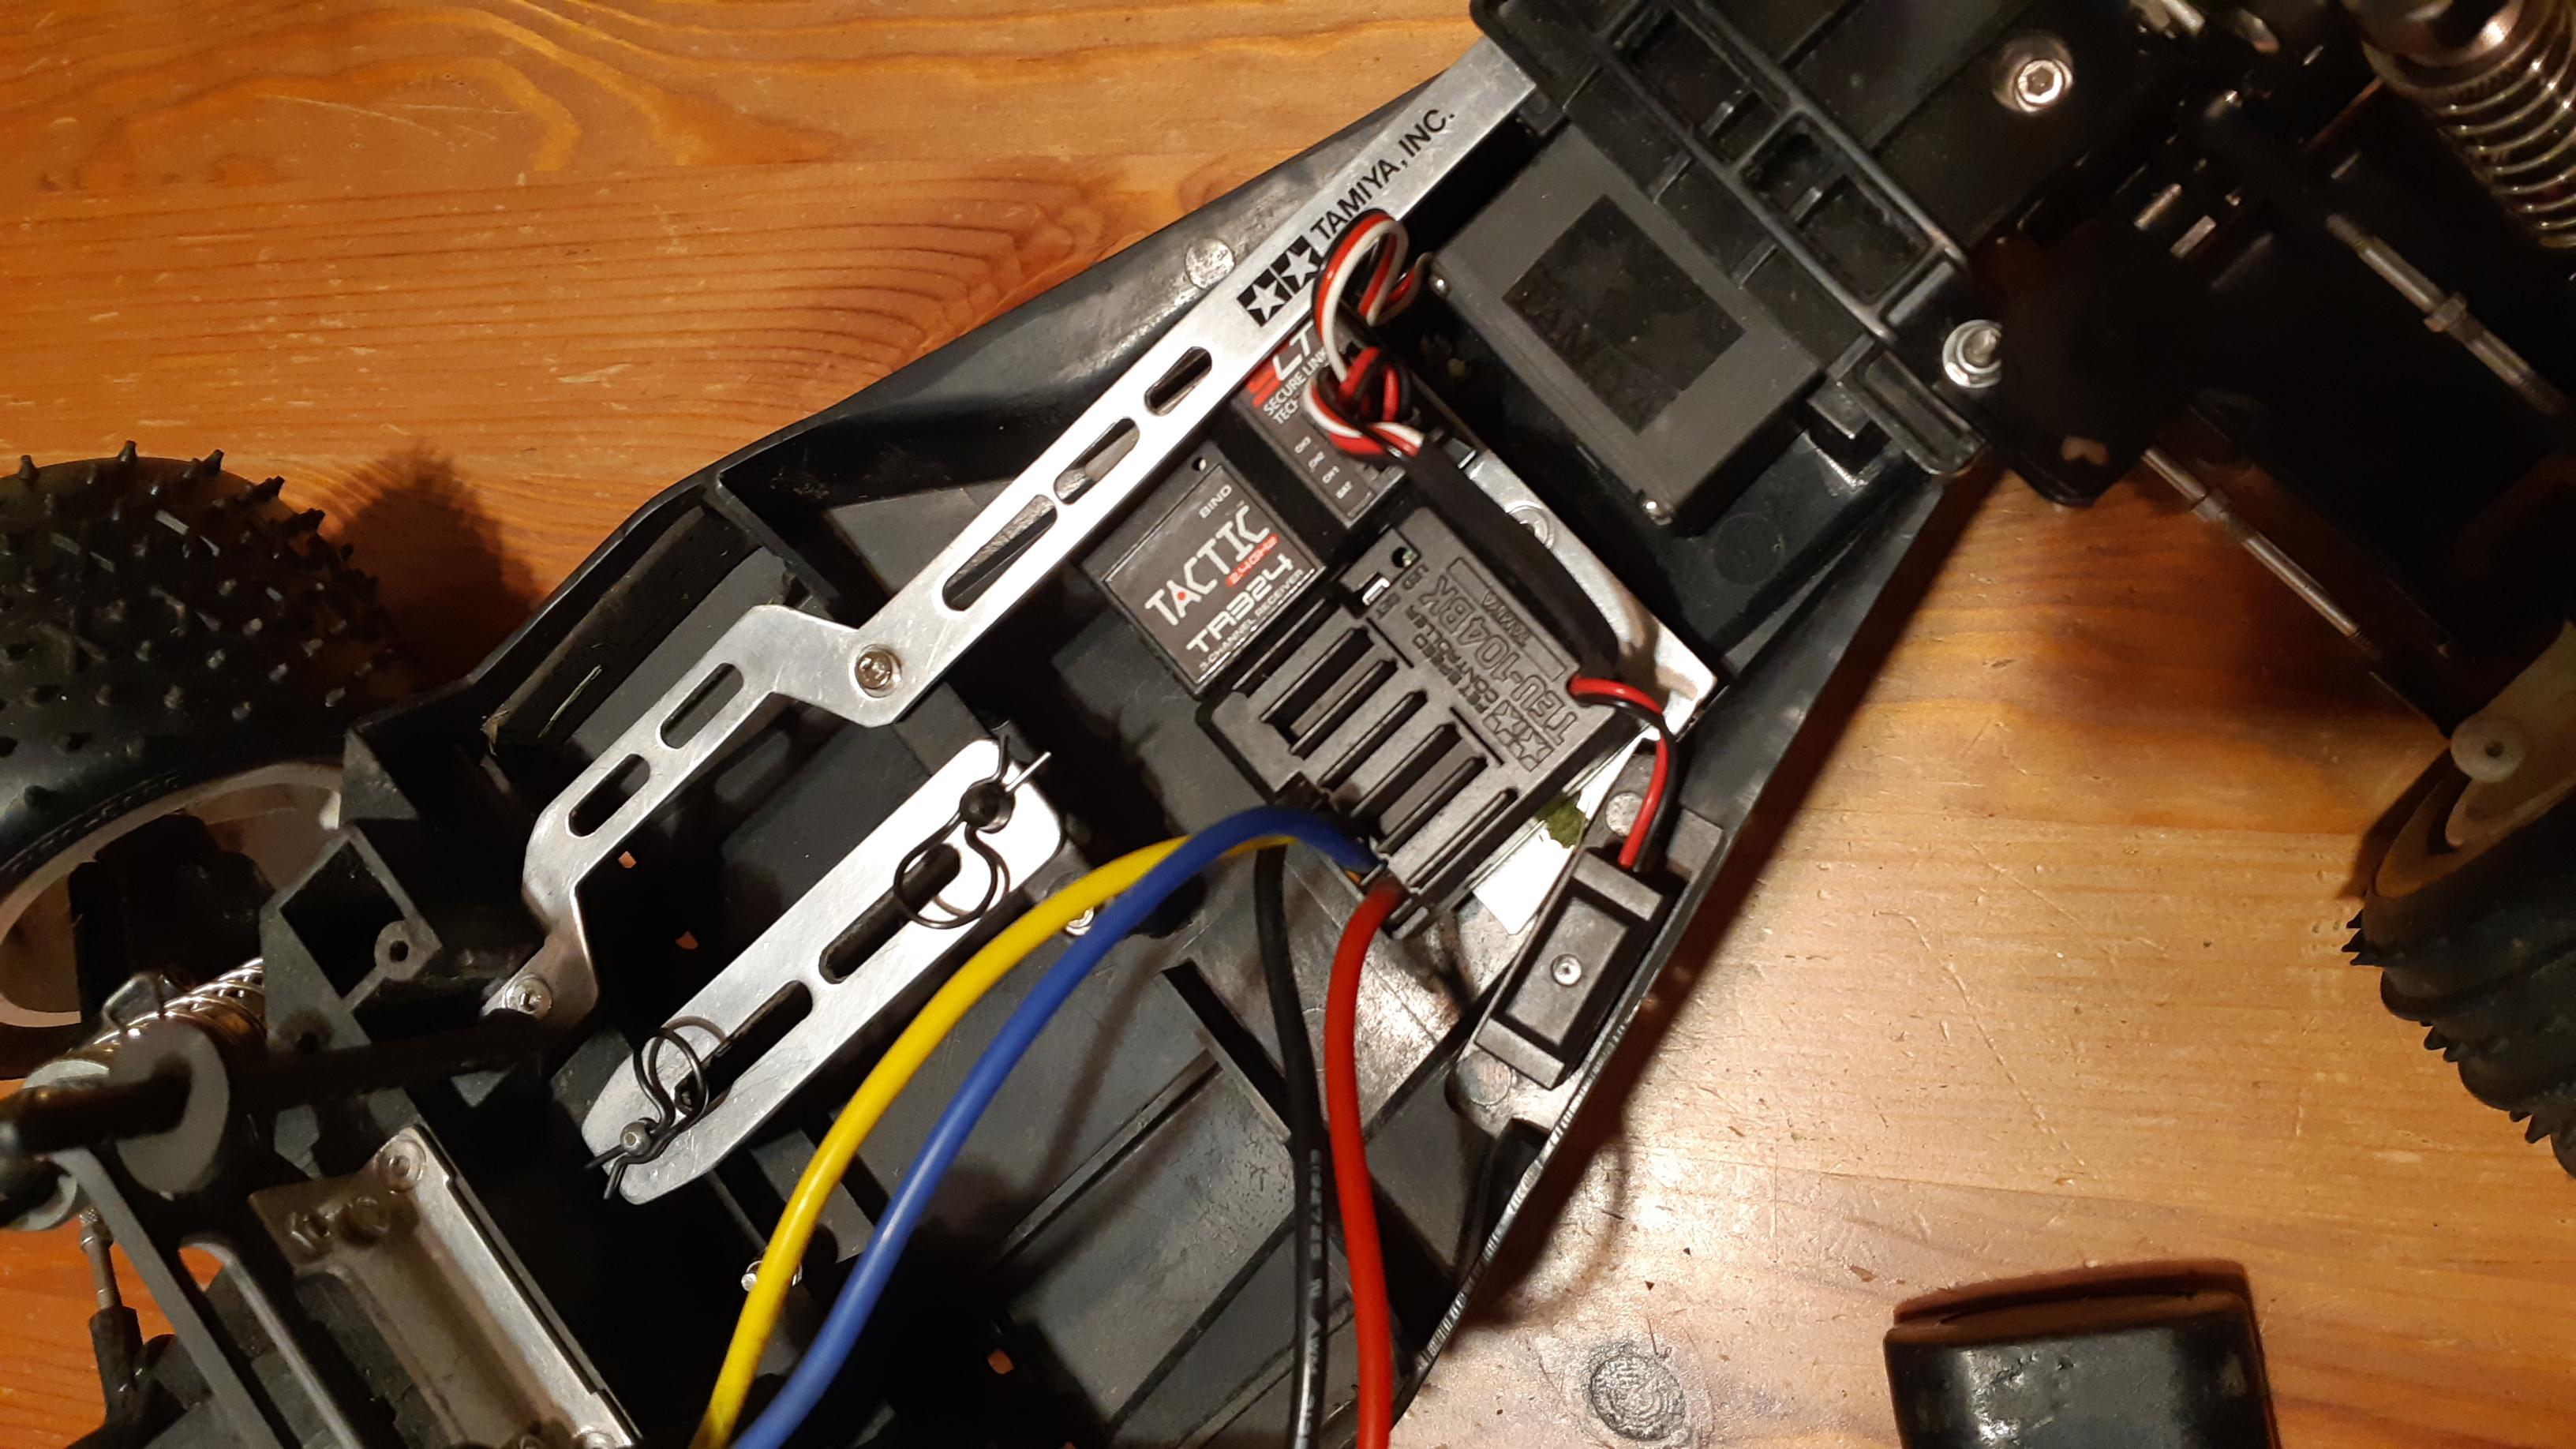
Hi, Wires have been shortened. Receiver and ESC set in the car.
Also, I want buy a new motor for my Blitzer. So do I have to buy a 21T or a 23T?
-
1
-
-
Hi guys. Thank you for all your comments and advices. Will post more pictures soon.
-
Pictures
-
7
-
-
More pictures!
-
3
-
-
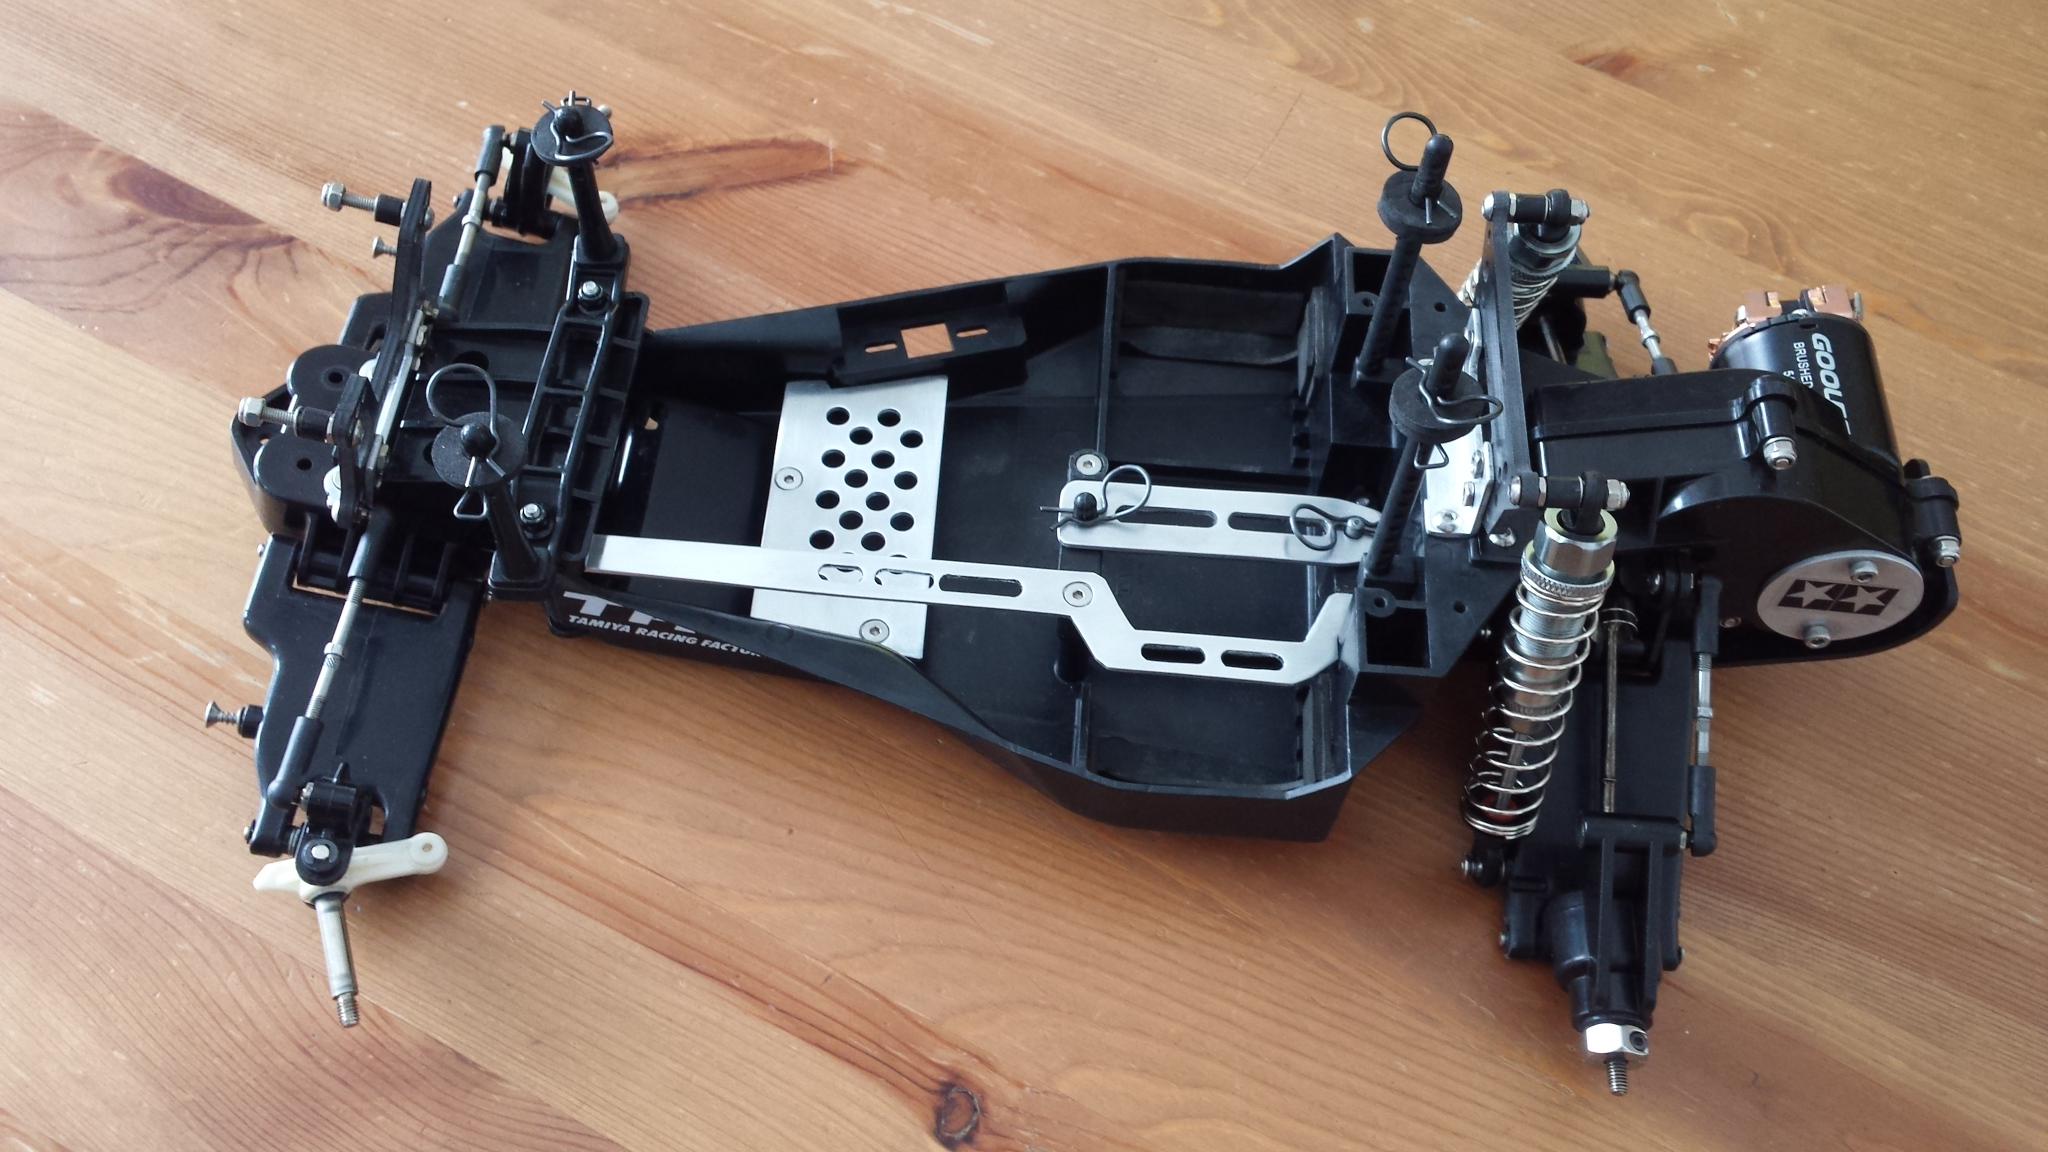
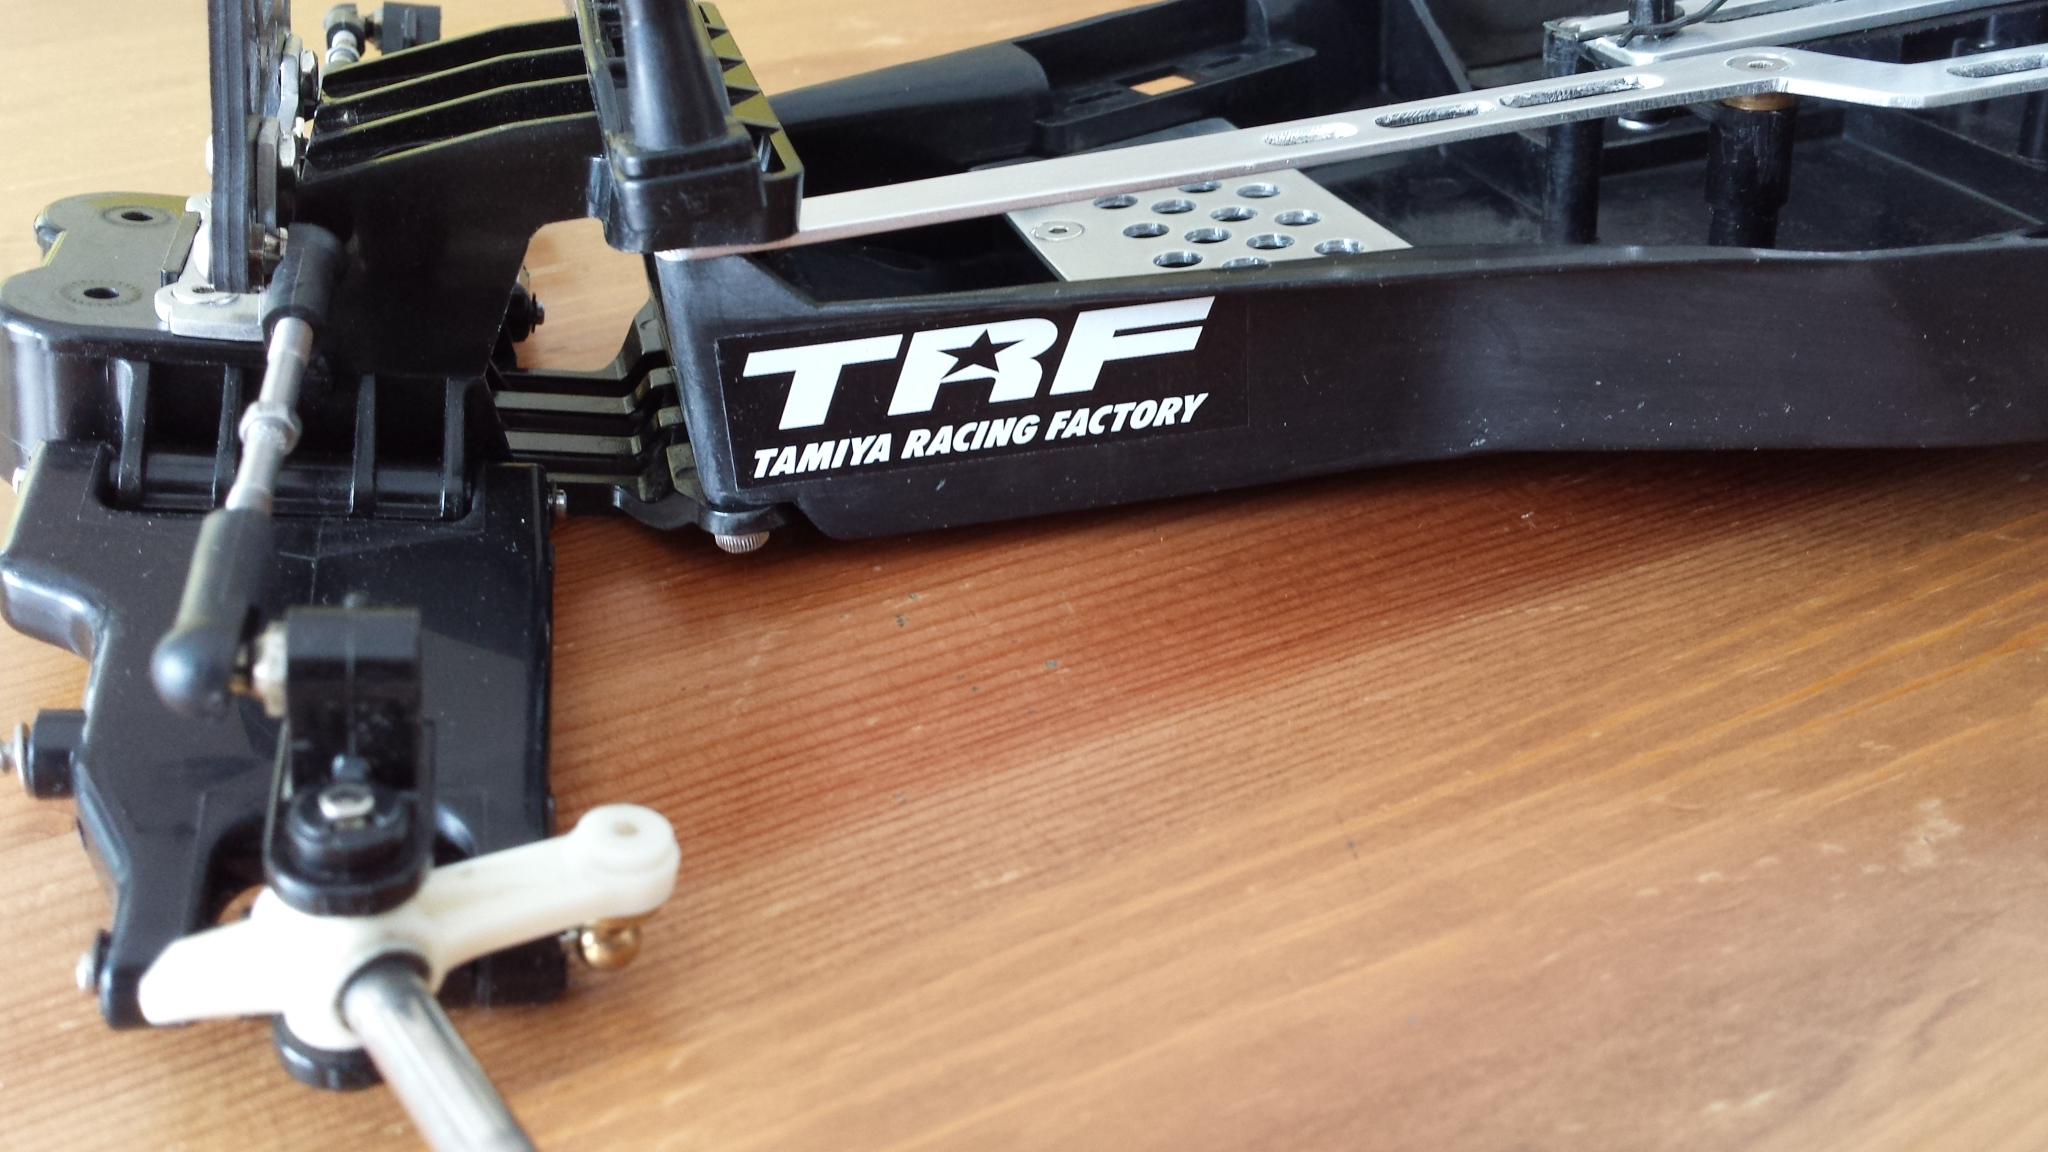
Hi! Long time no see. Some news about my modified Blitzer Stadium TRF
.
I tried to keep it with a vintage look. That's why I'm using aluminium instead carbon for my custom-made parts.
What has been done the last few months? So I have
1. replaced screws by shafts and e-clips (thanks schuultzie51).
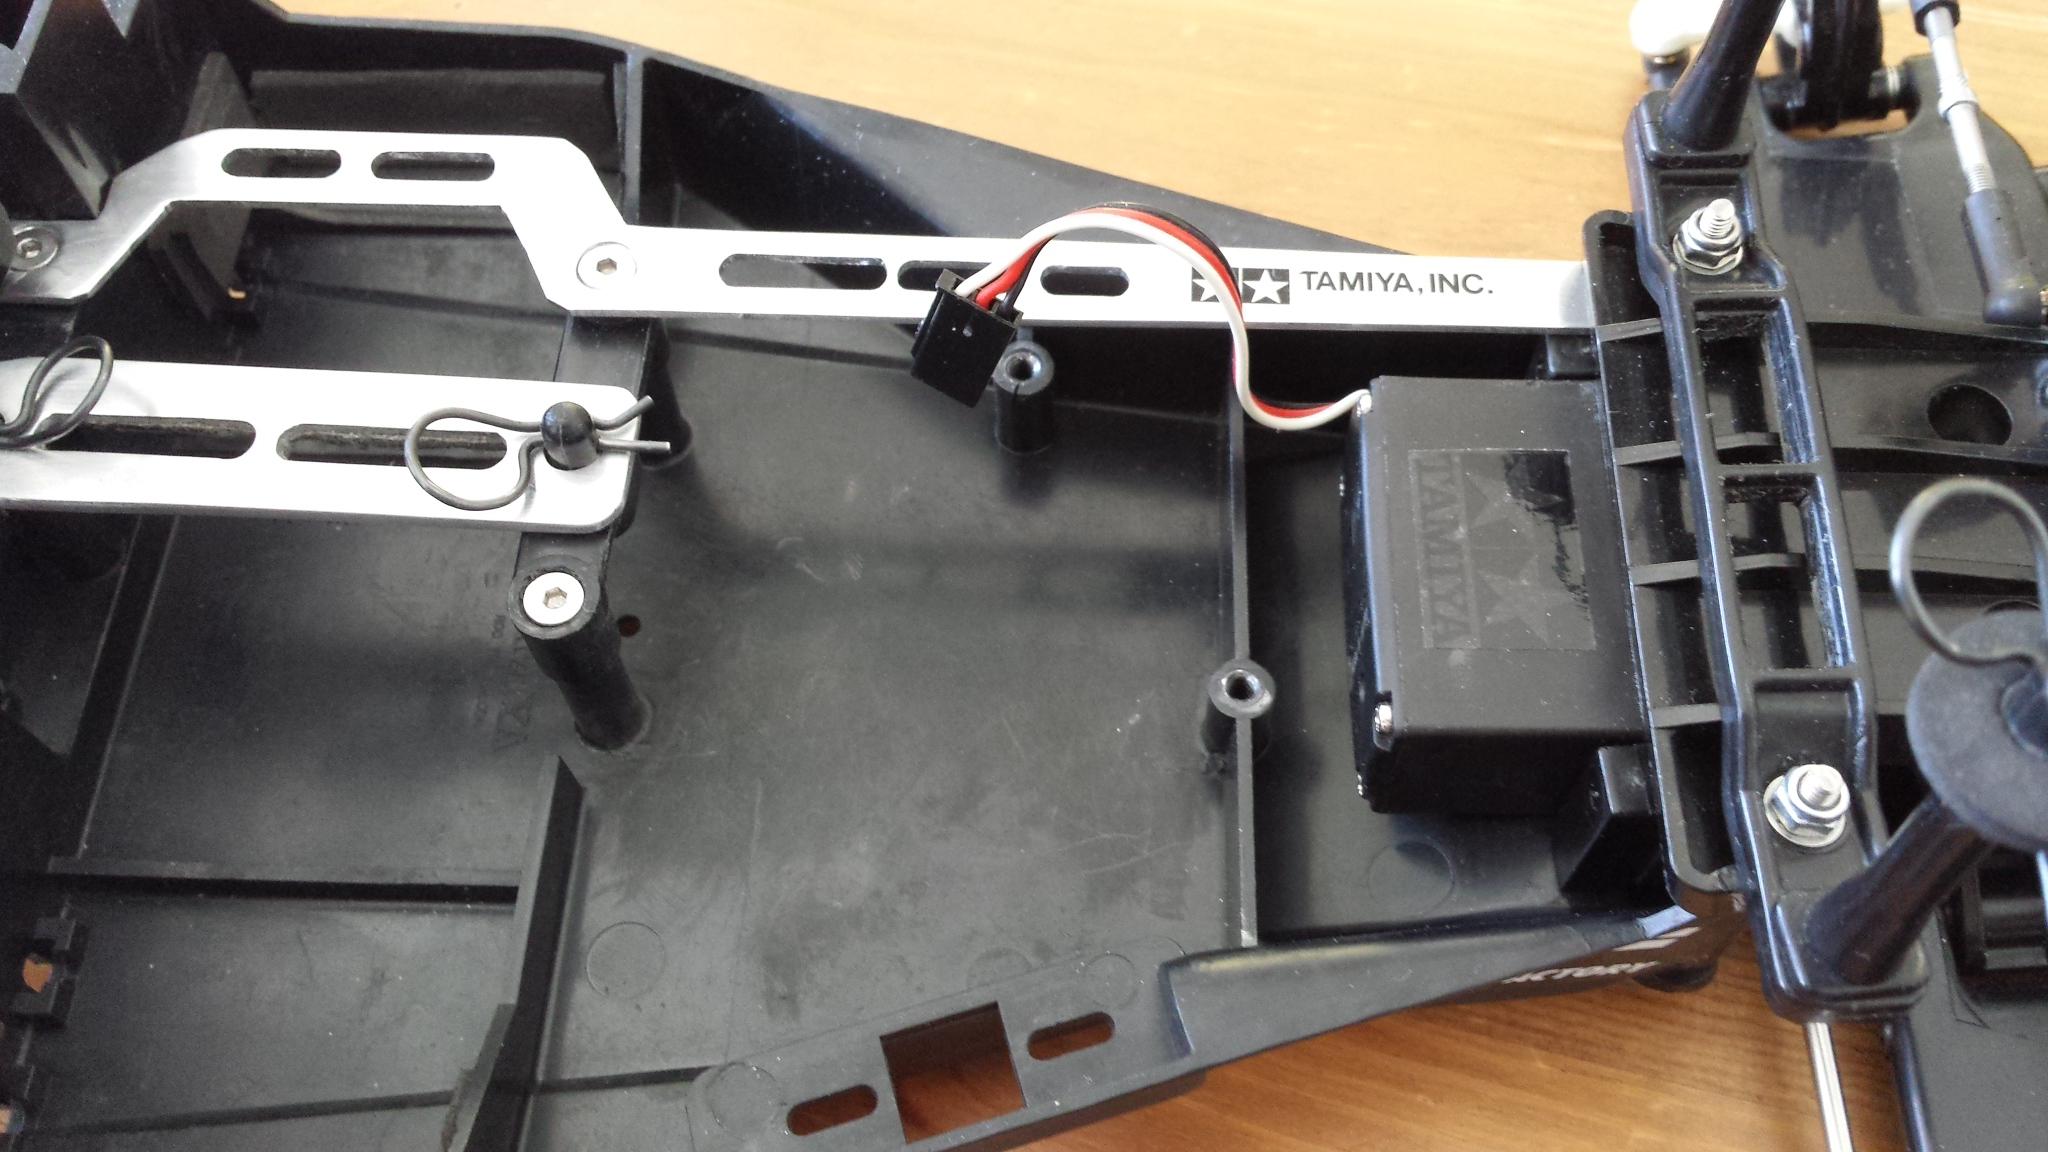
2. made a aluminium mount for the receiver and ESC. The goal is to be able to remove all electronics without have to double taped every time (and it looks really nice)
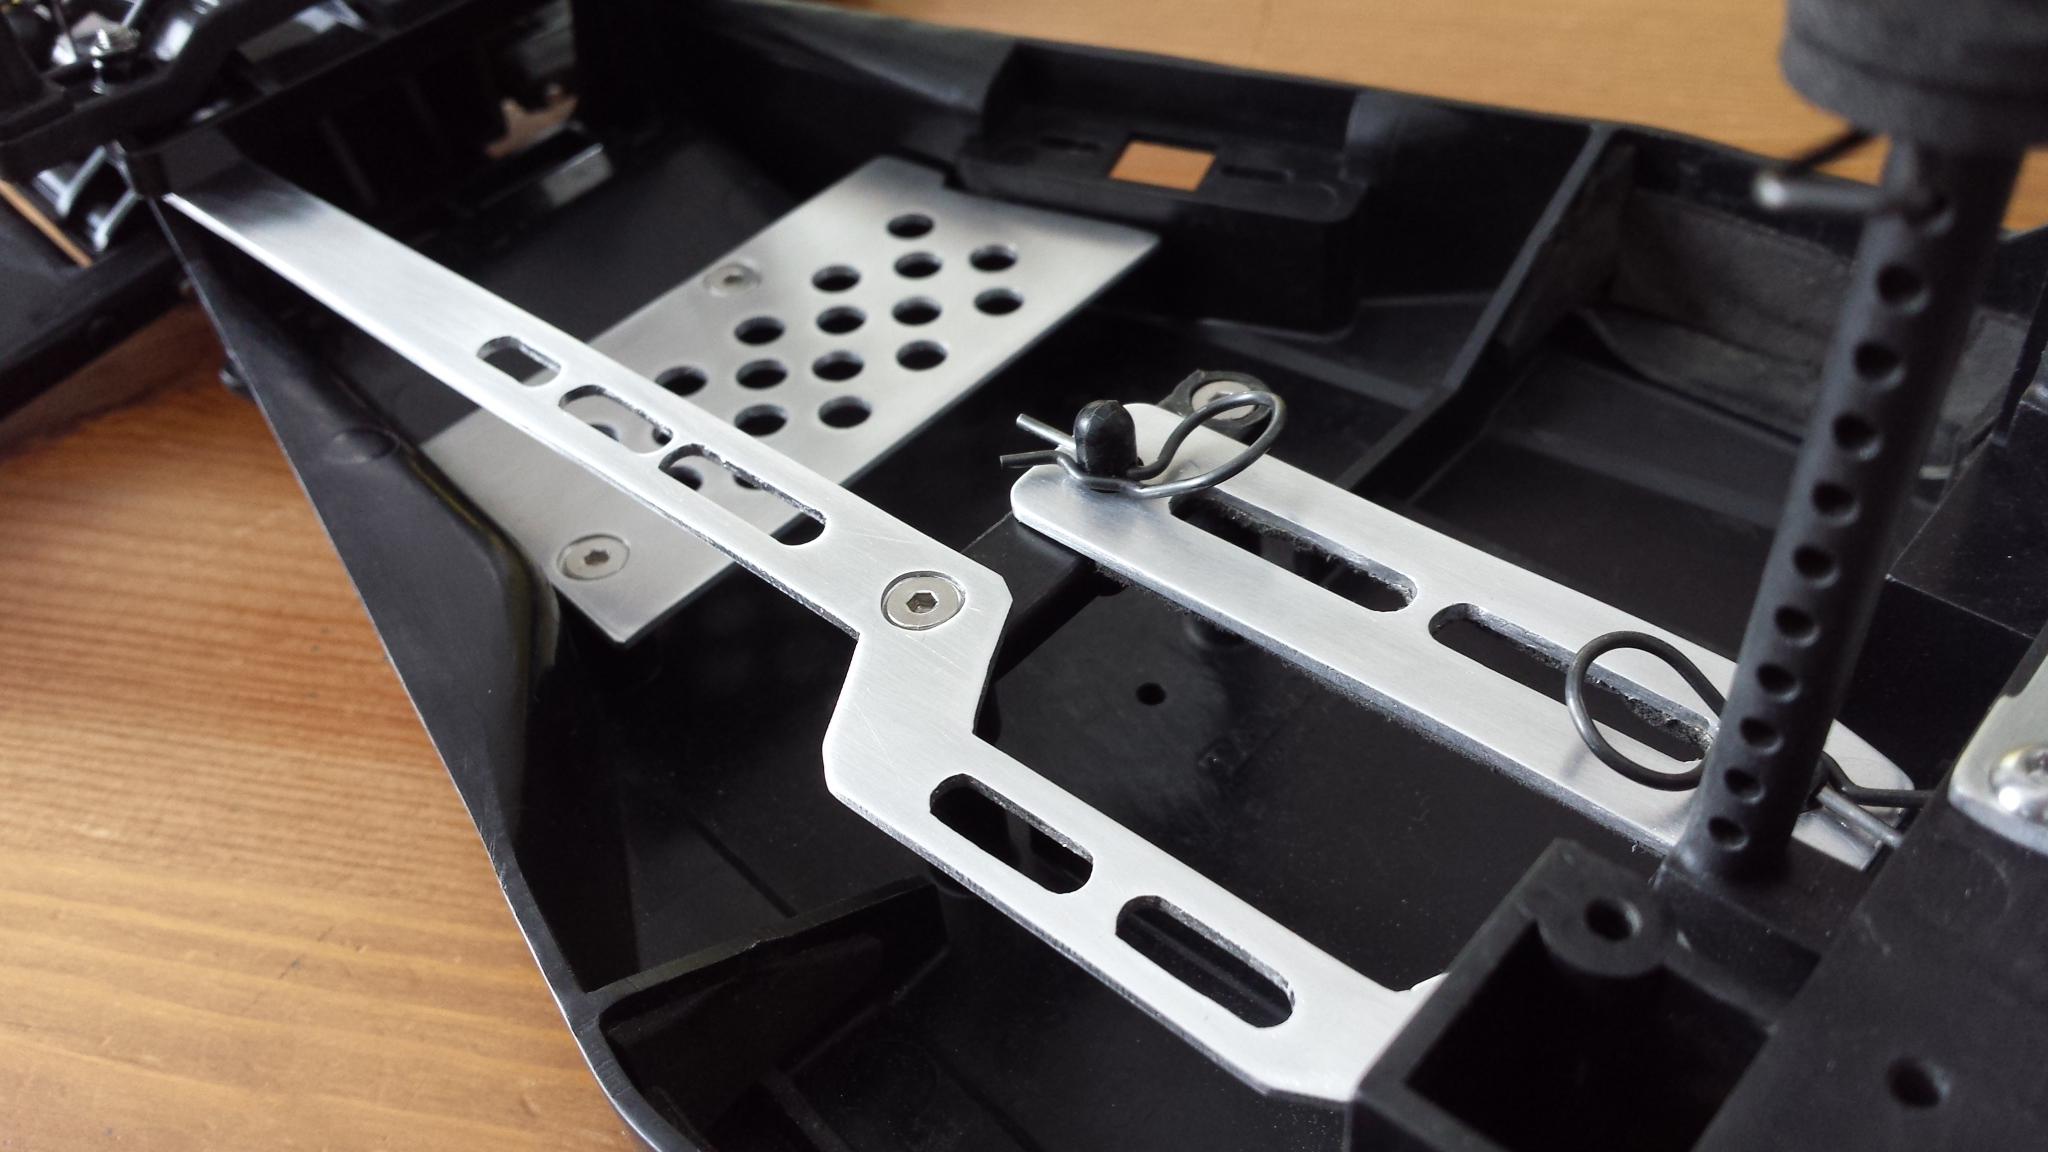
3. added a aluminium part to reinforce the chassis (low profile now) (and it looks nice too)
4. added cool TRF stickers
5. put in screws of good lenght where need it
6. changed the rear shock absorbers (waiting for the front)
My next steps will be:
- put back the electronics and cut the wires short and sweet
- buy a GoolRC motor (21T or 23T). Advices are welcome.
- buy a new metal gear servo (low profile)
- put a new and nice body. Larger than the original maybe.
- modified the bumper maybe (too big). Will see...
Finally, if you have a sense of observation, you will have noticed that the engine cover is mounted upside down on my picture. See the Tamiya's logo. :-)
Don't hesitate to comment.
See you!
Glob356 from Montreal
-
2
-
 1
1
-
-
My next mod on the Stadium: the steering.
-
1
-
-
6 hours ago, waterbok said:To find the right parts, some measurements might come in handy, ball bearing size and height/thickness of the ballbearing stacked parts. And how high does the parts have to be from the chassis plate.
The top force steering mount could fit as well as other parts from Tamiya. (Egress, Avante....)
Hi Waterbok,
Avante or Egress bushing (5 × 4 mm - see picture) could work but the high is 12mm. I could manage one at bottom and one at the top with something between those two bushings.
I looked at some manuals but didn't these steering arms.
Will figure out. Pictures show what I hope to achieve.
Glob356
-
Front body mount details.
-
1
-
-
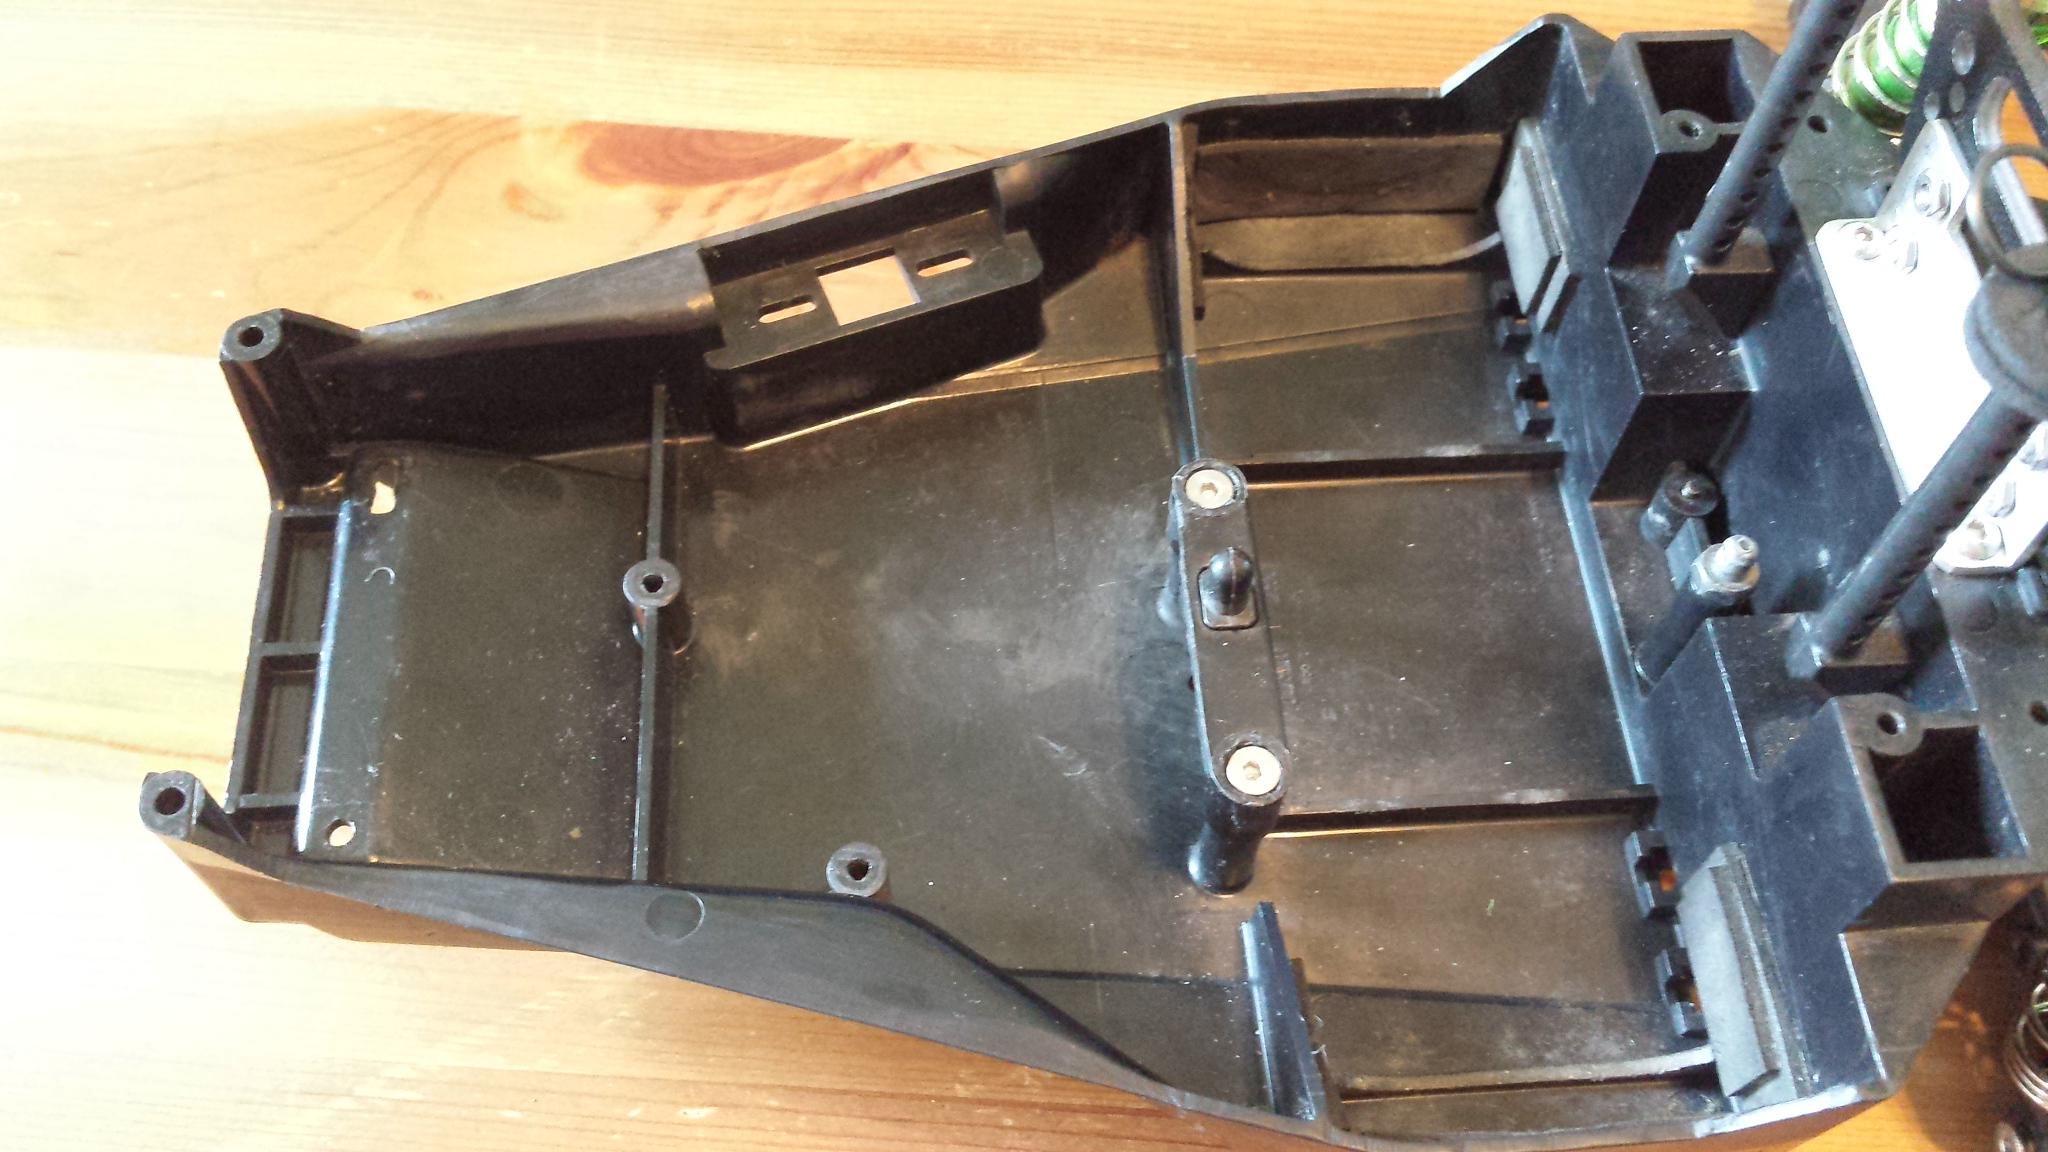
Hi Tamiyas,
One of my goals with my Blizter is to "update" the car. It look's heavy. More like a toy than a racing car. A lot of bg platic parts like the receiver and esc mount. No carbon, no hex screw.
So, I cut, I drilled, I used sand paper and here we go:
1. Removed the plastic part used for the receiver and esc. Cut in two to keed the battery fixation. Added hex screw. I use M3 × 20mm bit the are a bit too short. I have to buy longer ones.
2. Removed extra platic from the front body mount (just for the look) and put hex flat head screws (M3 × 12mm)
3. Drilled trough the chassis to attach the front suspension with a M3 × 45mm. Very common modification. On this picture, you can see that I have removed the top part of the chassis. It looks better without making the chassis weaker (according to me of course).
4. The same for the back (drill through). On the picture, I use M3 × 20mm (too long). I have just ordered M3 × 16mm hex button head screws.
If you have any comment or advice, please comment.
Have a great day where ever you are!
Glob356
-
1 hour ago, kontemax said:Hi mates,
I was planning to do onto the Blitzer Beetle but I took my break before.
I already did it on the Hot Shot 2 (Rat Shot) on the Egress and on the Wild Dagger:
Blitzer Beetle thread
Wild Dagger Mod Steering
https://www.tamiyaclub.com/showroom_model.asp?cid=11371&id=24
https://www.tamiyaclub.com/showroom_model.asp?cid=11372&id=24
Rat Shot Mod Steering
https://www.tamiyaclub.com/showroom_model.asp?cid=112078&id=24
Incredible! I modified the Ackerman angle on the Egress with a custom steering carbon plate and I forgot to make the pictures and post them in the thread... Ridiculous!
Max
Hi Max,
Thank you for all the information. I need to find a carbon sheet to create the link between the 2 arms and also to fin a way to fix the arms to the chassis.
I also want to replace some homemade aliminium parts by carbon parts. So the carbon sheet will be useful.
Glob356
-
1
-
-
3 hours ago, Collin said:Have a search for @kontemax blitzer beetle topic. He did a ackerman steering coversion in his RC.
Hi Collin,
By Ackerman conversion do you mean reverse the uprights. If it's the case, I have already done that. By the way, the uprights were too close to the front arms. So I modified the upright supports (see picture). Removed some plastic and and spacers (3× M3 0.5mm).
-
3 hours ago, Tamiyabigstuff said:Which kit number is this steering assembly from ?
Checked the manual for Stadium Blitzer kit 58482 and it does not look anything like the parts in your pictures.
I have no idea. 😊 I have those from spare parts bought long time ago.
-
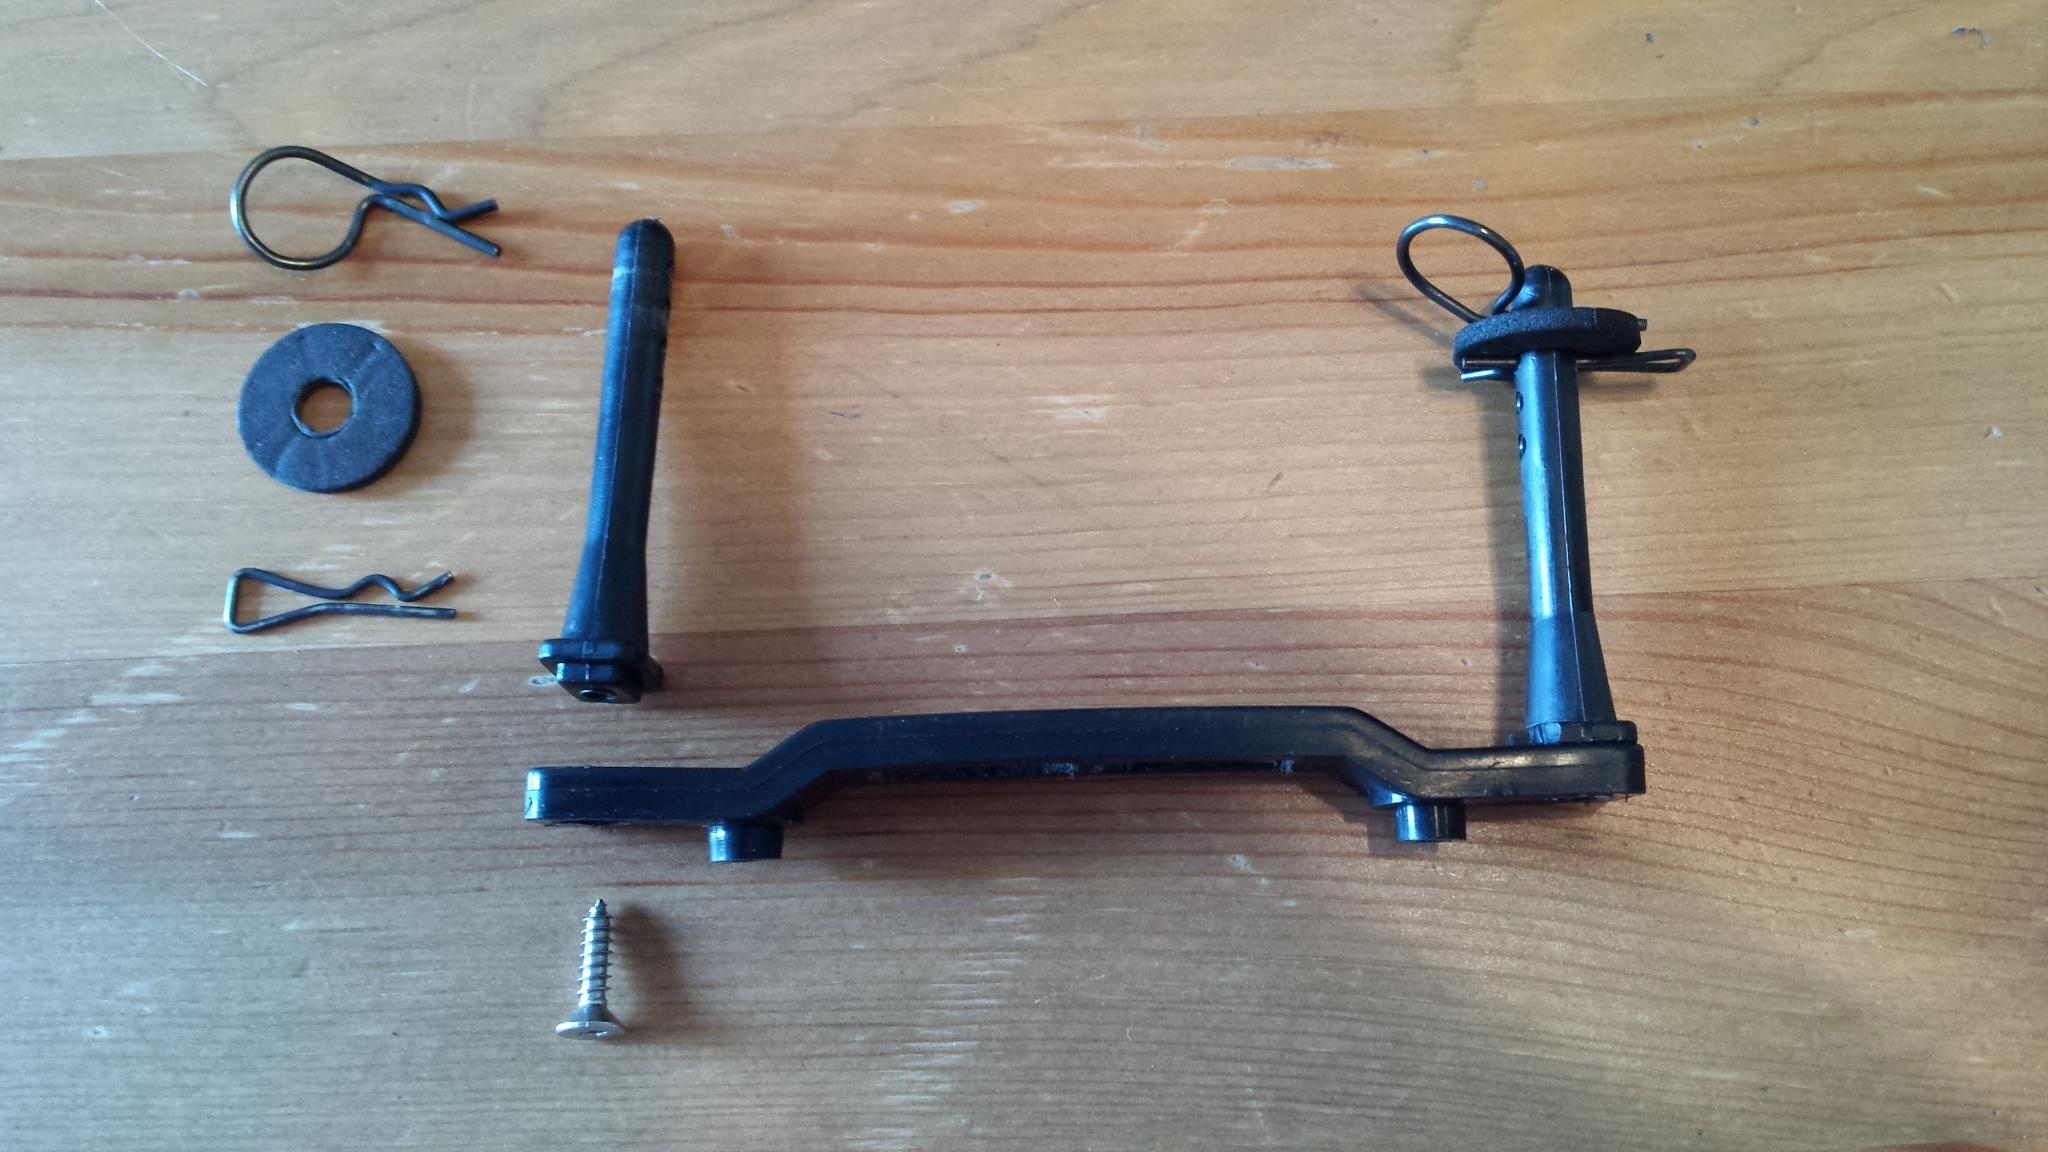
Hi Guys,
I have some steering parts that I want to use on my Blitzer Stadium but I don't have the aluminium mount (see pictures). If you know the number or code of this part (to fix the arms at the chassis) please comment.
It will be really appreciated.
Tks
Glob356
-
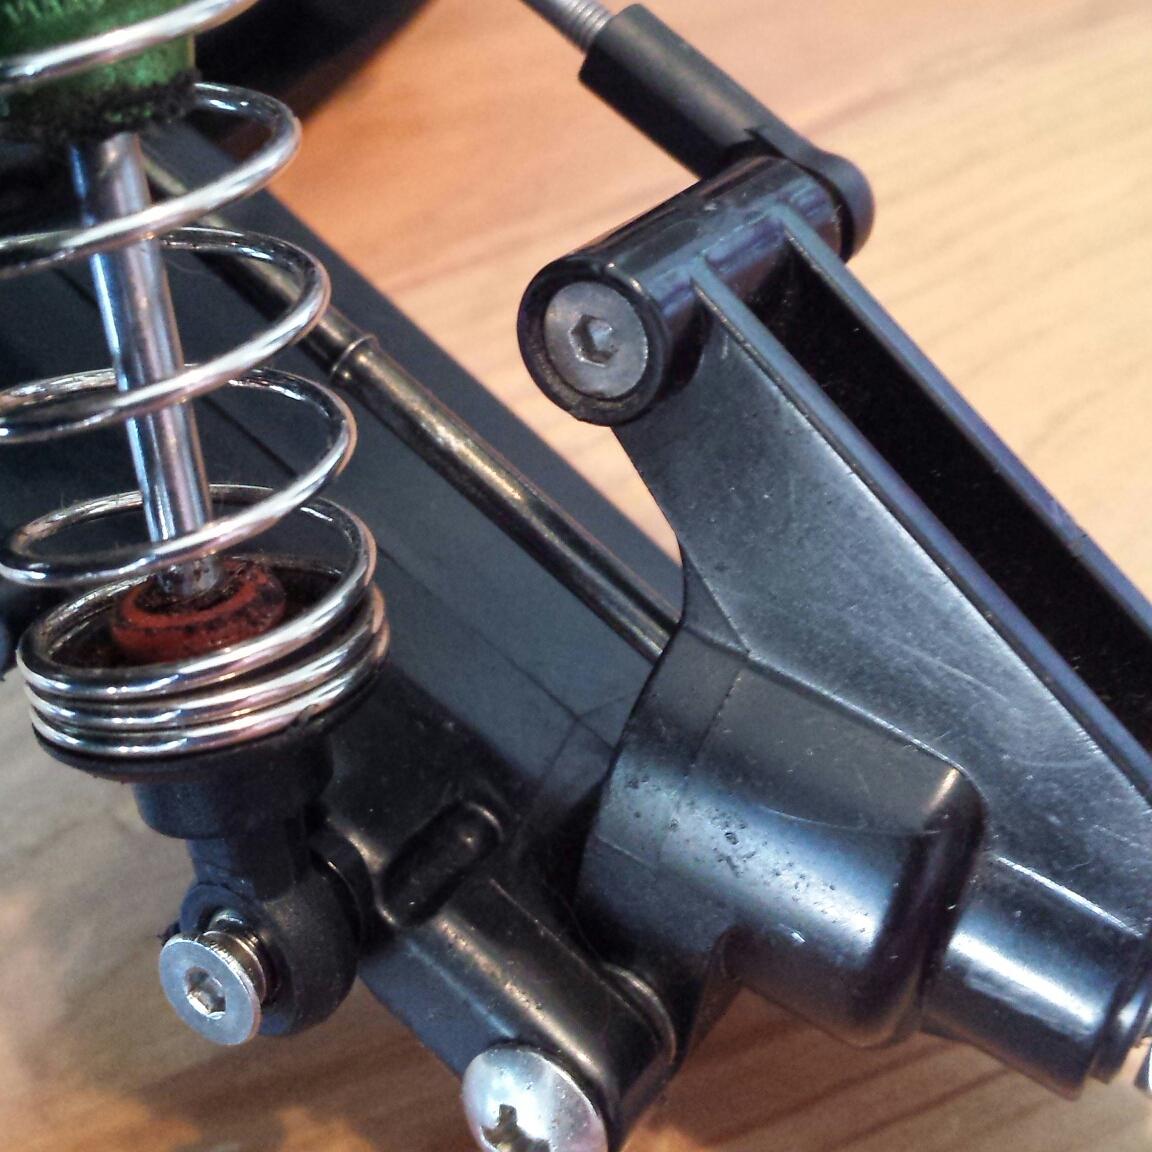
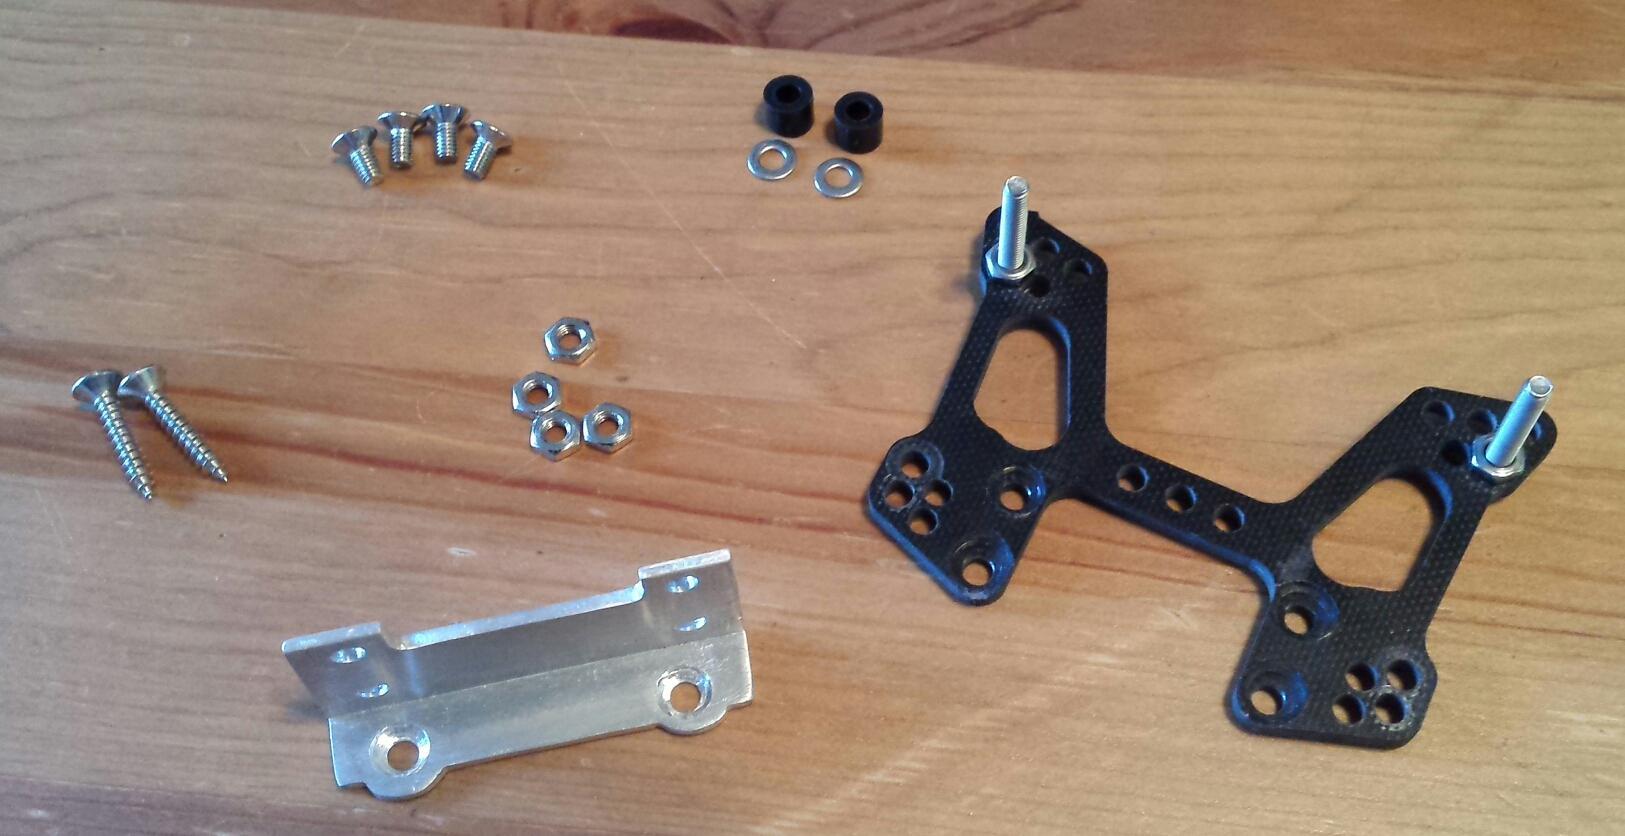
Hi Guys,
Please find below the front shock tower details:
- 90° aluminum mount (20mm high)
- 4x M3 hex flat head screws 6mm (head included)
- 4x M3 thin nuts
- 2x M3 hex flat head self tapping screw 16mm (head included)
- 2x M3 hex button head screws (20mm)
- front shock tower from HSP
You will notice on the picture that I drilled the plastic part. It's just to have space for the nuts at the bottom of the mount.
I buy all my screws on ebay, most of the time from Hong Kong (it's faster than China)
Don't hesitate to comment if you have any question.
Glob356
-
1
-
7 minutes ago, Collin said:You made 90° aluminum mount for the carbon damper stays? Any more details about it?
Another addon for the blitzer family are parts from Pintopower: https://www.tamiyaclub.com/forum/index.php?/topic/85233-stadium-blitzer-family-chassis-brace/
I made a brace for the gearbox: https://www.tamiyaclub.com/forum/index.php?/topic/85292-hits-me-like-a-blitzer-beetle/&do=findComment&comment=701261
Keep on man, I like mods.
Hi Collin,
You are right. It's a 90° aluminum mount. I will post detailed pictures later.
By the way, it's really cool that you commented. I'm on this forum now because I was reading your posts and @schuultzie51 posts.
Glob356
-
6 hours ago, Re-Bugged said:There is always something deeply satisfying about putting your stamp on on something, keep up the good work mate.
I'll be taking my Blitzer for a spin after work tomorrow.
Have a great run!
-
1
-


Blitzer Chassis Dust Cover
in The Builds
Posted
Hi @Re-Bugged,
Great job on the dust cover.
Could you please tell the brand and model of the rear tires of your blitzer?
Tks.
Glob